Permanent Workflow Lab
Objective
Create a Permanent Workflow that will run every hour and bring the list of people whose attributes have been modified.
SQL
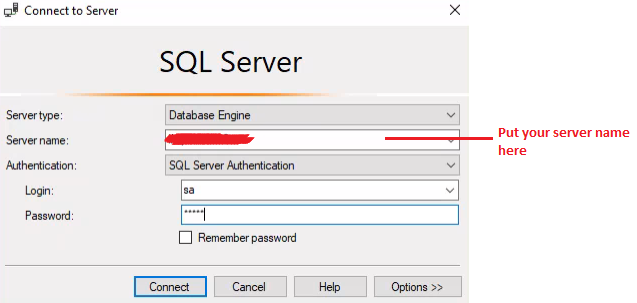
Credentials
- User ID: Here, put whatever user ID has been provided to you.
- Password: Here, put whatever Password has been provided to you.
-
Once your SQL Server Management Studio is opened, create a stored procedure for retrieving the persons whose attributes have been modified in the last X number of days.
-
Click on the New Query button and write below script.

-- In the USE clause ensure you pass your database name otherwise script will not run
USE [EmpowerID_7.208]
GO

SET ANSI_NULLS ON
GO
SET QUOTED_IDENTIFIER ON
GO

-- Here you can give any name to your stored procedure but make sure you use the same name in the code as well.
Create procedure [dbo].[HS_Custom_Person_GetModifiedPeople]
(
    @LastModifiedInDay int
)
AS
BEGIN
    Select P.*
    from Person (nolock) as P
    where P.Deleted = 0 and P.ModifiedDate > DATEADD(day, - @LastModifiedInDay, GETUTCDATE())
END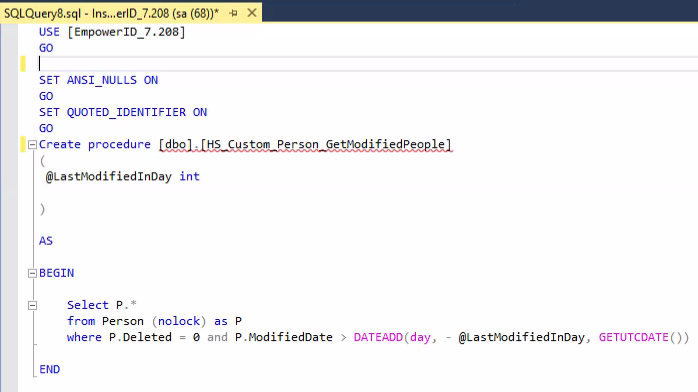
-
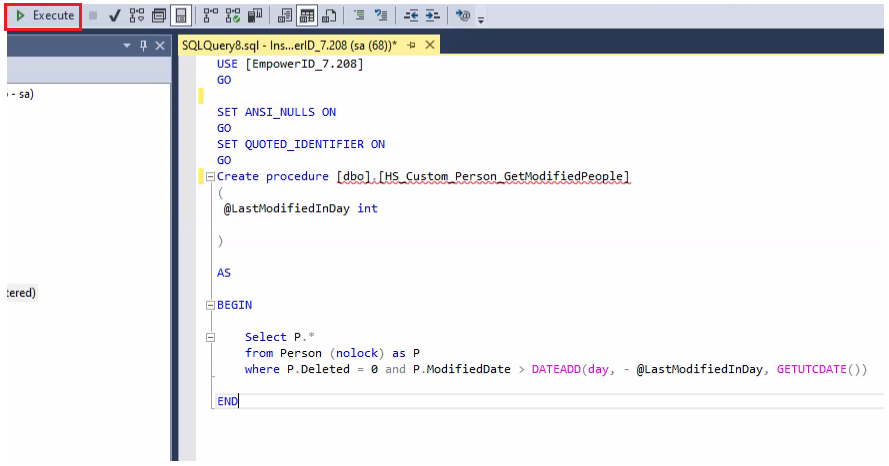
Now click on the Execute button to create a stored procedure.
-
Now, if you want to test your stored procedure, you can do so by-passing different parameters.

Workflow Studio
Credentials
- User ID: Test
- Password: P@$$w0rd
-
Start the 20331B-NYC-DC-05 virtual machine. Wait for the virtual machine to display the Desktop.
-
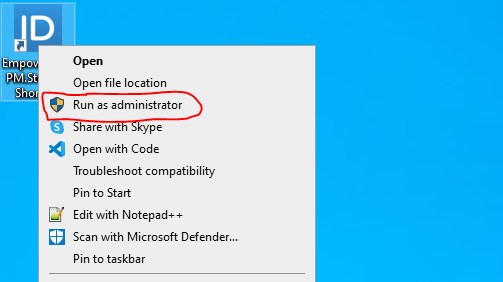
On your Desktop, Right-click Workflow Studio (WFS), and then click Run as administrator.
-
Wait for WFS to start and enter your credentials.

-
In Solution Explorer, right-click on the Developer Packages folder, create a new folder called DemoLabs, and click the Ok button.

-
Add New Folder dialog box will appear from it; select the following options:
- User Interface > Lookup Control
- User Interface > Forms
- User Interface > UI Pages
- Workflows > Applications
And click the Ok button.

-
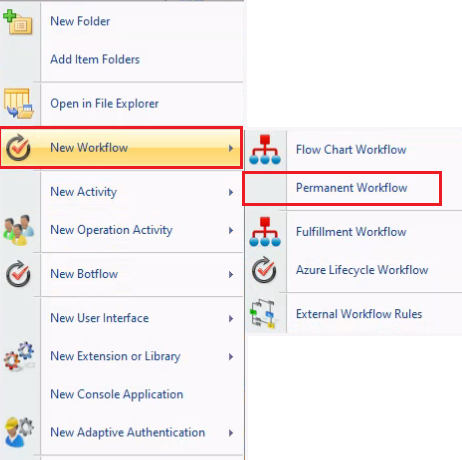
Expand the Developer Packages folder, find the DemoLabs folder, expand it under the DemoLabs folder, expand the Workflows folder, right-click on the Applications folder, hover your mouse on the New Workflow option and Click on Permanent Workflow.
-
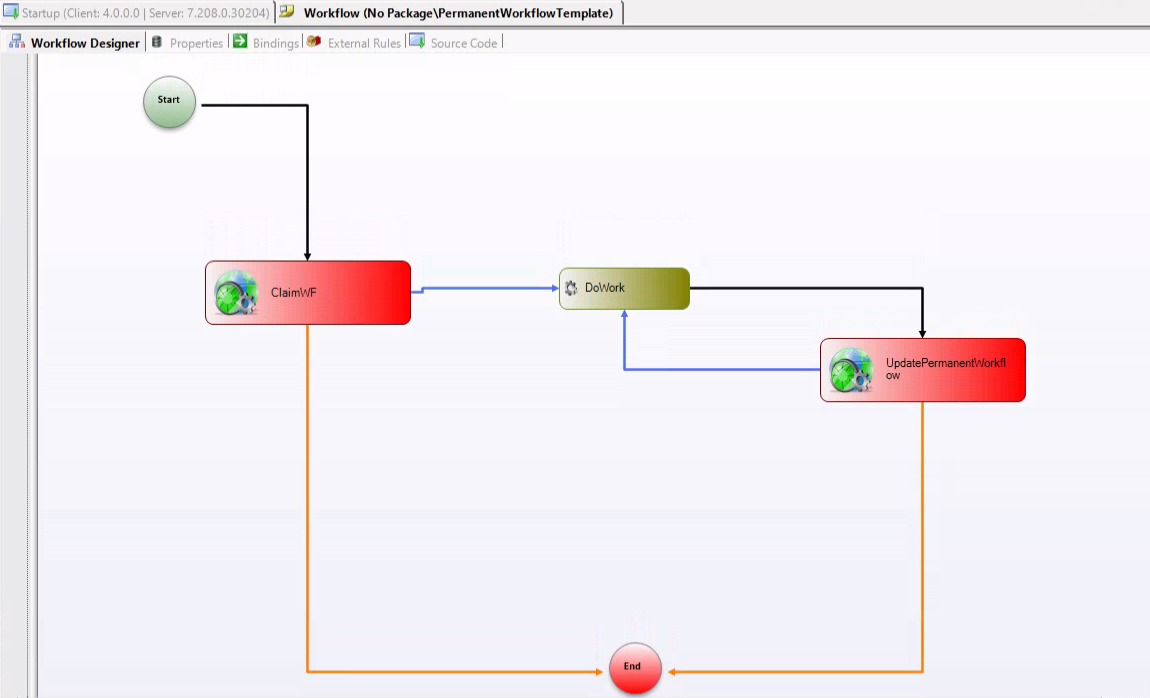
This action loads the Permanent Workflow Template.
-
Click on the Save button to save your Permanent Workflow and give it the name HS_PermanentWF.
-
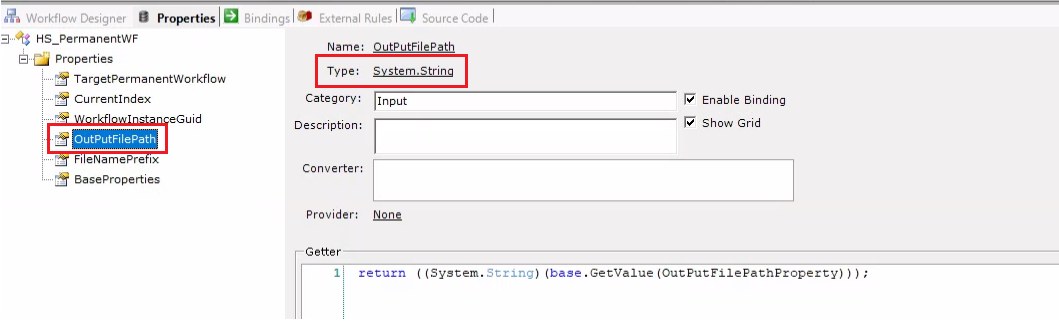
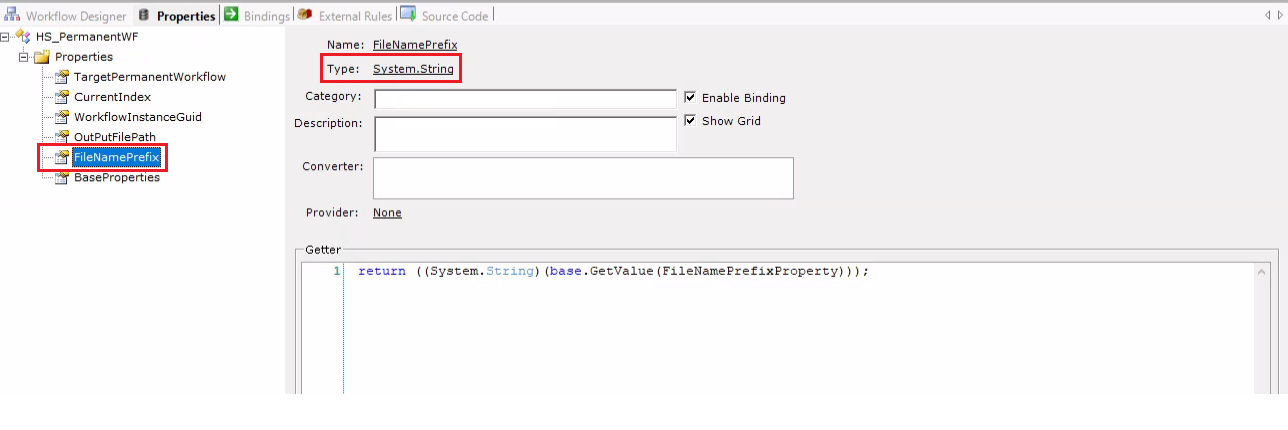
Now go to the properties tab and create two properties of type string.
- OutPutFilePath
- FileNamePrefix
-
Now double click on the DoWork activity or right click on the DoWork activity and then click on Edit DoWork_ExecuteCode.
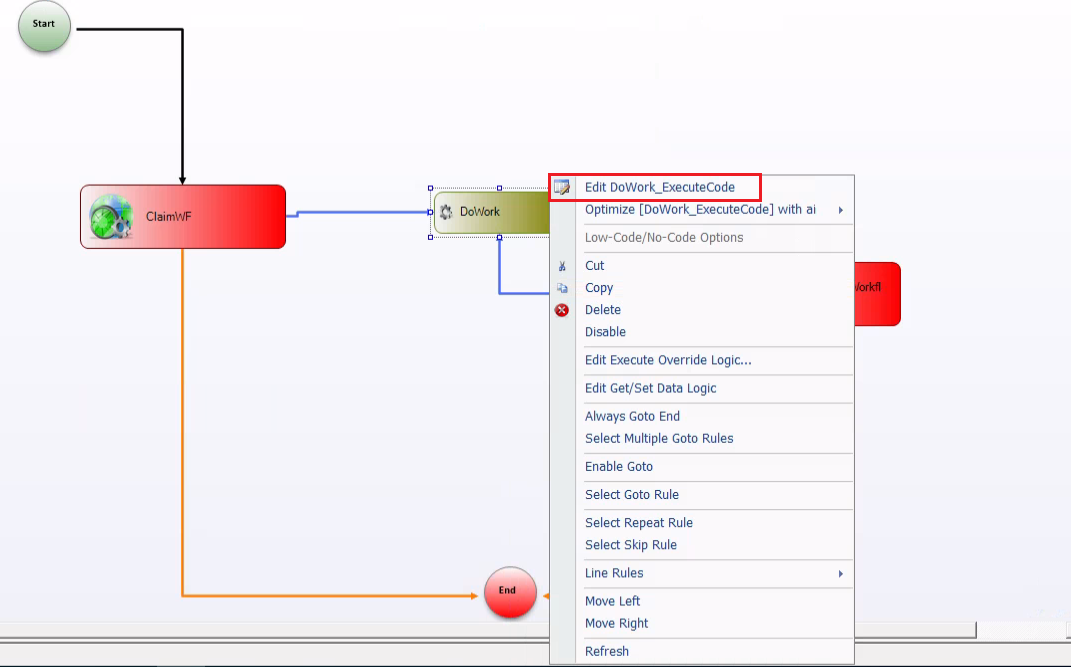
-
It will open the code editor for you where you can write your custom logic to perform any task or action.

-
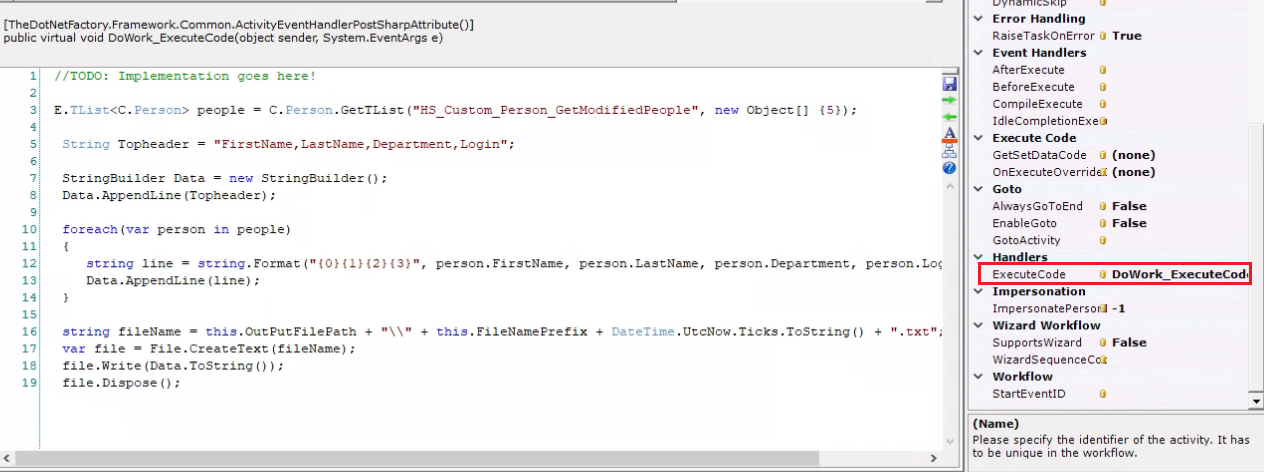
In this code editor, I will write the code to call the stored procedure we created earlier. The stored procedure will return values, and I will write those values to a text file. Here is the code to accomplish that.
// Calling my stored procedure and passing the 5 as an input for my stored procedure
E.TList<C.Person> people = C.Person.GetTList("HS_Custom_Person_GetModifiedPeople", new Object[] {5});

String Topheader = "FirstName,LastName,Department,Login";

//Initiating the StringBuilder Object
StringBuilder Data = new StringBuilder();

//We are using StringBuilder because StringBuilder objects are mutable and they offer better performance than string objects of type System.String when heavy string manupulation is involved
Data.AppendLine(Topheader);

//Looping through the items returned by the stored procedure and storing them in a StringBuilder object.
foreach(var person in people)
{
    string line = string.Format("{0}{1}{2}{3}", person.FirstName, person.LastName, person.Department, person.Login);
    Data.AppendLine(line);
}

//Here we are creating a file on our local machine
string fileName = this.OutPutFilePath + "\\" + this.FileNamePrefix + DateTime.UtcNow.Ticks.ToString() + ".txt";
var file = File.CreateText(fileName);
//Here we are writing the data into our newly created text file.
file.Write(Data.ToString());
file.Dispose();
-
Now publish your workflow both from the Workflow Studio and then by going to the EmpowerID Web UI.
-
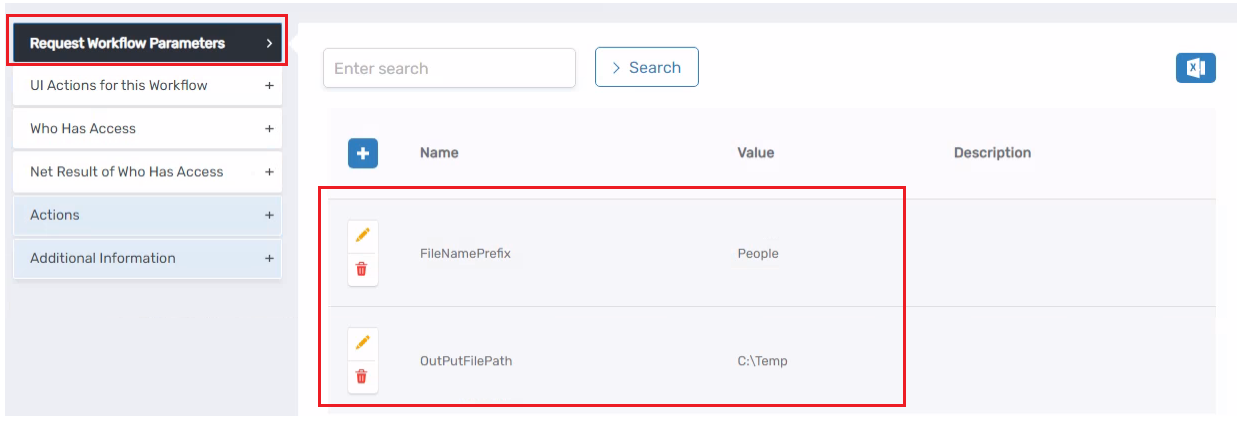
After publishing your workflow, go to its ViewOne page and set the values for the properties you created in Workflow Studio.
-
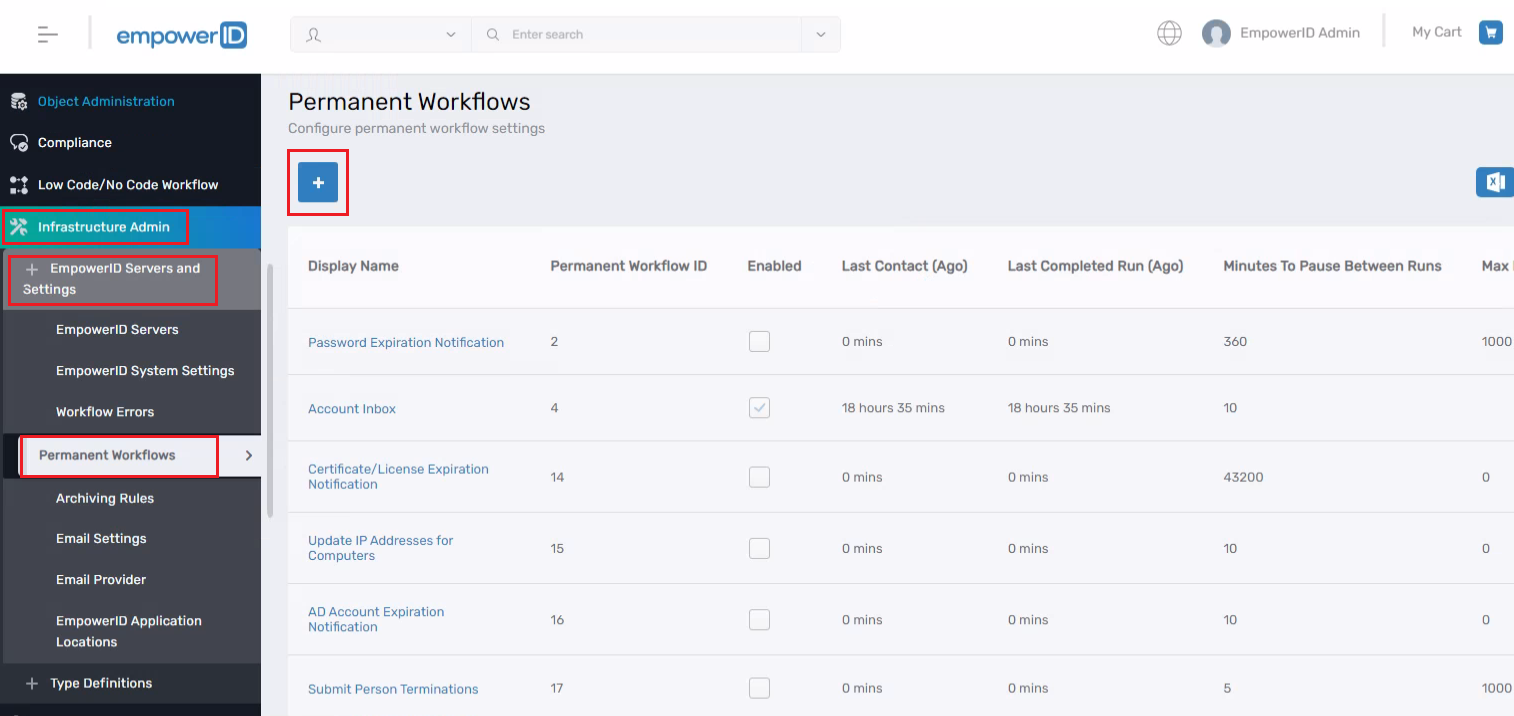
Now, navigate to Infrastructure Admin > EmpowerID Servers and Settings and select Permanent Workflows. Now click on the + icon to create a permanent workflow.
-
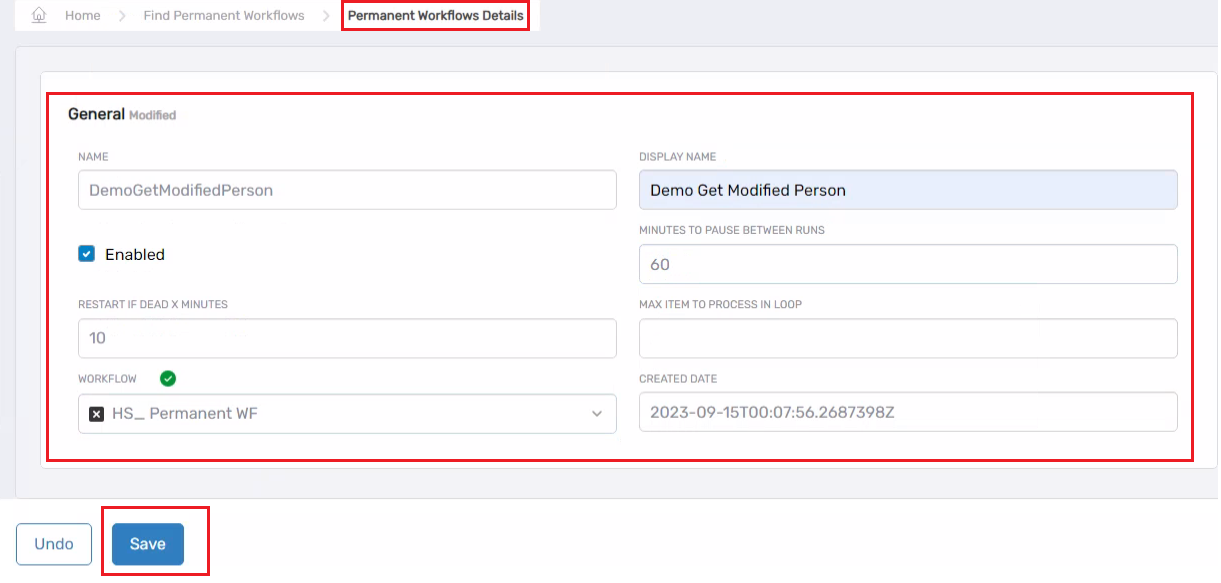
Now, on the Permanent Workflows Details tab, fill out all the fields as shown in the image below and click the save button.
-
Now, this Permanent Workflow will run every hour, fetch the persons who have been modified in the last hour, and write down the results in a notepad file.
You can also run the Permanent Workflow using the following command

-
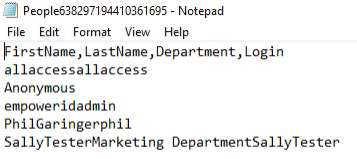
Let’s go to the path we have defined and see if it has created the file and written anything in the file.
-
In the above image, you can see that it has retrieved the names of users who were modified in the last hour. There are some formatting issues, but addressing them is not within the scope of this lab tutorial.
-
END